#1 Rated Cleaning Co. NE Florida 2025 Serving St. Johns, Duval, & Nassau County
Signature Service
Every paver installation in Florida faces the same enemies: joint sand loss, weed infiltration, ant colonization, color fade, and surface instability. Most companies spray sealer over the problem. We fix the foundation first — removing 100% of failed sand, re-packing joints with angular ASTM-grade material, and applying a breathable two-coat sealer system that protects from within. The result: pavers that look, feel, and perform like the day they were installed.
Serving Nocatee · Ponte Vedra · Jacksonville · St. Augustine · Amelia Island · Palencia
Licensed · Insured · Background-Checked · ICPI-Informed Methods
Watch how we transform neglected pavers back to their original beauty — step by step
This video walks you through exactly what happens during a professional paver sanding and sealing project — from the initial cleaning and old sand removal to final sealer application. We believe educated homeowners make better decisions, so we show you everything: why joint sand matters, how we prep the surface, what sealer we use, and why our process lasts years longer than the competition.
Have questions after watching? Call (904) 466-1622 or request a free estimate.
Every unsealed paver in Florida is actively deteriorating — even when it looks fine
Northeast Florida's climate is uniquely destructive to interlocking paver systems. The combination of heavy rainfall (50+ inches annually), extreme UV exposure, high humidity, salt air along the coast, and subtropical biological growth creates a relentless cycle of degradation. Joint sand washes out within 1–3 years of installation. Once the joints are compromised, the entire system begins to fail: pavers shift, weeds root in, fire ants colonize the voids, and rainwater penetrates the bedding layer beneath. Sealing without fixing the sand is cosmetic at best. Fixing the sand without sealing leaves it exposed to the same cycle. Our process addresses both — simultaneously and correctly.
Empty or partially filled joints allow pavers to rock, shift, and separate. Proper re-sanding with angular ASTM-grade material locks the interlock system back into place — this is what prevents individual pavers from moving under load.
Sealed joints with proper angular sand are far more resistant to weed germination and ant colonization. Seeds can't root in compacted, sealed sand. Fire ants can't tunnel through it. The result: dramatically less maintenance year over year.
Florida's UV index regularly exceeds 10 — higher than most of the continental US. Unsealed pavers fade rapidly, losing the rich colors you originally selected. A quality breathable sealer filters UV penetration and enhances the existing color depth without altering the surface texture.
Sealed pavers repel oil, leaf tannins, rust from irrigation systems, and organic stains. Instead of absorbing into the paver's pores on contact, contaminants sit on the sealed surface where they can be cleaned before they set. Pool decks, driveways, and outdoor kitchens benefit enormously.
Breathable (water-based) sealers allow trapped moisture to escape as vapor while preventing liquid water from penetrating the surface. This is critical in Florida — film-forming sealers trap moisture beneath, causing hazing, whitening, and peeling. We use only breathable formulations.
Well-maintained hardscaping is one of the first things buyers and guests notice. Sealed, level, weed-free pavers signal a home that has been meticulously cared for. For sellers, it's one of the highest-ROI exterior maintenance investments you can make.
Understanding why pavers fail faster here than anywhere else
Northeast Florida receives intense, concentrated rainfall — often 2–4 inches in a single afternoon thunderstorm. This volume of water washes joint sand out of paver gaps with every storm. Most installations lose 30–60% of their original joint sand within the first 2–3 years without intervention.
Florida's UV exposure fades pigments in concrete pavers rapidly. South-facing and west-facing surfaces fade the fastest. Without UV-filtering sealer, you'll notice color loss within the first year — and it accelerates from there. Sealed pavers retain their depth of color significantly longer.
Coastal communities like Ponte Vedra, Nocatee, and Amelia Island face salt-laden air that accelerates surface erosion. Combined with 75–90% average humidity, pavers stay damp longer — creating ideal conditions for algae, mold, and efflorescence (white mineral deposits).
Algae, mold, mildew, and lichen thrive year-round in Florida's climate — there is no winter kill-off. Unsealed pavers in shaded areas near irrigation or pools can develop visible biological growth in as little as 4–6 weeks during summer months. Sealing reduces organic attachment dramatically. For heavy biological growth, soft washing is the safest pre-treatment before restoration.
Every phase builds on the previous one — skip a step and the entire result is compromised
Most paver sealing companies skip straight to spraying sealer. That's like painting over rust. Our system addresses every layer of the paver system — surface, joints, bedding stability, moisture, and finish — in the correct sequence for maximum durability. This process is informed by ICPI (Interlocking Concrete Pavement Institute) standards and manufacturer guidance.
We begin with a thorough deep clean using a professional surface cleaner (not a wand tip — wand tips create uneven cleaning lines and can damage paver faces). The surface cleaner provides uniform pressure distribution at consistent height across the entire surface. During cleaning, high-pressure water blasts old, contaminated, and rounded joint sand out of every gap. This is intentional — old sand is compromised and cannot be re-compacted effectively. We remove it all and start fresh.
Why it matters: Old joint sand contains organic matter, rounded grains (that don't lock together), and micro-organisms. Sealing over it traps contaminants beneath the sealer, causes premature adhesion failure, and leaves the joints unstable. Clean joints = strong foundation.
Once the surface is fully cleaned and joints are cleared, we install fresh joint sand meeting ASTM C144 and ASTM C33 gradation standards. This is angular (crushed) sand — not round "play sand" or "beach sand." The angular particle shape is critical: sharp, irregular edges interlock mechanically when compacted, creating a dense, load-bearing matrix that resists washout far better than rounded alternatives.
Sand is swept into every joint, vibrated or compacted to full depth, and topped off. We repeat this fill-compact-fill cycle until joints are packed to within 1/8" of the paver face. Under-filled joints fail prematurely. Over-filled joints prevent sealer from bonding at the joint edge.
⚠ Why We Don't Use Polymeric Sand
Polymeric sand contains Portland cement or polymer binders that harden in the joint. While this sounds beneficial, it creates a rigid joint in a flexible paver system — and in Florida's heat, the expansion/contraction cycling cracks polymeric sand within 1–2 seasons. Once cracked, it's extremely difficult to remove. Worse, polymeric sand hazing (a white film on the paver surface from improperly cleaned binder residue) is one of the most common complaints in our industry. Angular ASTM sand with a breathable sealer outperforms polymeric sand in Florida's climate at a fraction of the risk.
Before sealer touches the surface, every square inch must be completely dry. Florida's humidity makes air-drying unreliable — even on a sunny day, paver pores retain moisture. We use propane torches to systematically dry the surface and joint sand. This step accomplishes three things simultaneously:
Why it matters: Applying sealer to a damp surface is the #1 cause of hazing (a cloudy white film trapped beneath the sealer). Once hazed, the only fix is chemical stripping and re-application — an expensive, avoidable mistake.
The first coat (D1 — dilution 1) is a heavily diluted application designed for maximum penetration into the paver body and joint sand. This is not a surface coating — it's a sub-surface treatment. The diluted sealer is applied liberally ("flood coat") so it flows deep into paver pores, joint sand interstices, and the micro-gaps between sand particles. As it cures, it binds sand grains together from within and creates a hydrophobic barrier deep in the paver structure.
Why it matters: The D1 coat is where the real protection happens. Surface-only sealers wear off. A sealer that has penetrated into the paver body continues protecting even as the surface layer weathers. This is also what locks joint sand in place — the sealer bonds individual sand grains together, creating a monolithic, water-resistant joint.
Once the D1 coat has cured, the second coat (D2 — dilution 2) is applied at a higher concentration. This coat sits closer to the surface and provides the visible finish: color enhancement, UV filtering, and the chosen sheen level (natural, low-gloss, or wet-look). The D2 coat also adds an additional layer of stain resistance and biological growth deterrence at the surface level.
Why it matters: A single coat of sealer can't do both jobs well. The D1 penetrates deep but doesn't leave enough at the surface for UV protection or stain resistance. The D2 builds on the D1 foundation to create a complete protection system — deep and surface, structural and aesthetic.
This is the most overlooked detail in paver restoration — and it makes or breaks the entire result
Joint sand is not just "filler" — it's the structural element that holds your entire paver system together. Interlocking pavers are designed to transfer load across the field through friction in the joints. When joints are empty or packed with the wrong material, individual pavers bear the full load alone. They shift, rock, and separate. Understanding sand types is essential to understanding why some paver restorations last years and others fail in months.
| Property | Angular ASTM Sand ✓ | Rounded / Play Sand ✗ | Polymeric Sand ✗ |
|---|---|---|---|
| Particle Shape | Sharp, angular, irregular | Rounded, smooth | Mixed + polymer binder |
| Interlock Ability | Excellent — edges grip | Poor — grains roll | Rigid bond (cracks) |
| Washout Resistance | High (w/ sealer) | Very low | High initially, then fails |
| Flexibility | Moves with pavers | Moves with pavers | Rigid — cracks under thermal cycling |
| Florida Performance | 3–5+ years | 6–18 months | 1–2 years before cracking |
| Re-Service Ease | Easy — clean & re-apply | Easy — but fails again | Difficult — must chisel out |
| Hazing Risk | None | None | High — binder residue |
ASTM C144 (masonry sand gradation) and ASTM C33 (concrete sand gradation) are the engineering standards that define proper angular sand for hardscape joints. We source sand that meets these gradations — specifically Trident Joint Sand, which is ASTM C-144 compliant and available in six color-matched options. Sand quality is the foundation everything else depends on.
The right sand color transforms the finished look — the wrong one cheapens it
Most homeowners don't realize that joint sand comes in a range of colors — and that color choice dramatically affects the finished appearance. Generic gray sand in warm-toned pavers looks institutional. The right premium angular sand color complements the paver tone, enhances the pattern, and creates a cohesive, intentional look. We use Trident Joint Sand — an ASTM C-144 compliant angular sand engineered specifically for hardscape restoration, available in six colors to match virtually any paver palette.
Pearl
Light pavers, cream, travertine
Tan
Warm-toned, sandstone hues
Fieldstone
Natural, earth-toned pavers
Gray
Cool-toned, concrete look
Platinum
Silver, modern pavers
Black
Dark pavers, charcoal tones
How we choose: During your on-site estimate, we evaluate your paver color, pattern, and surrounding landscape to recommend the ideal Trident Joint Sand color. We bring samples so you can see the options against your actual pavers — not a screen. Premium color-matched angular sands cost slightly more than generic material, but the aesthetic difference is immediately visible and lasts the life of the sealer.
Not all sealers are equal — and in Florida, the wrong sealer does more harm than no sealer at all
Paver sealers fall into two broad categories: breathable (water-based) and film-forming (solvent-based acrylics). In Florida's hot, humid climate, the choice is critical. Film-forming sealers create a hard shell on the surface — they look glossy initially, but they trap moisture beneath them. Within 6–18 months, that trapped moisture causes whitening (hazing), peeling, and blistering. Breathable sealers allow water vapor to escape while still repelling liquid water, resisting UV, and enhancing color. Every paver job we do uses breathable, water-based sealer technology.
Choose the look you want — we'll engineer the performance you need
Invisible protection. Pavers look exactly as they did when installed — no added sheen. Color is enhanced subtly without any surface gloss. Ideal for homeowners who want protection without changing appearance.
A subtle sheen that deepens color and gives pavers a "just-rained" look without high reflectivity. The most popular choice for driveways, pool decks, and patios. Rich appearance without the maintenance of wet-look.
Maximum color depth and reflective sheen. Makes pavers look permanently wet. Dramatic on dark-colored pavers and herringbone patterns. Note: higher-sheen finishes may require more frequent maintenance coats.
For pool decks, spa surrounds, and entryways, traction is a safety requirement. Breathable sealers inherently provide better wet traction than film-forming alternatives because they don't create a smooth surface film. For areas requiring additional grip, non-slip additives can be incorporated into the D2 coat. We'll assess your specific surface texture and location during the estimate.
Every paver application has unique exposure, traffic, and aesthetic requirements
The highest-traffic, highest-load paver surface on your property. Subject to vehicle weight, tire turning stress, oil drips, and maximum UV exposure. Proper joint sand compaction is especially critical here — loose joints under vehicle load accelerate paver shifting rapidly. See our driveway & concrete cleaning page for maintenance between re-seals.
Constant water exposure, chlorine splash, sunscreen oils, and bare-foot traffic. Pool deck pavers need breathable sealer (film-forming traps water and whitens), adequate traction, and stain resistance. We protect pool water during the entire process. Learn more about our pool deck cleaning service.
Your primary outdoor living space. Exposed to food and drink spills, furniture pressure points, and often partially shaded (which promotes biological growth). Sealed patios clean more easily and resist the stains that come with daily outdoor living.
The first impression. Front walkways and entryways set the tone for your entire property. Weed-filled, faded, or shifting pavers undermine even the most beautiful home. This is often the first area guests and buyers see — and judge.
Grease spatters, charcoal residue, red wine, and sauce spills are the norm around outdoor cooking areas. Without sealer, these stains absorb immediately and permanently. Sealed pavers around outdoor kitchens save thousands in eventual replacement costs.
Paver steps, pool coping, and raised borders have exposed edges that catch water and debris. These areas are more susceptible to joint sand loss and shifting because they lack the surrounding field to hold them in place. Extra attention during re-sanding is critical.
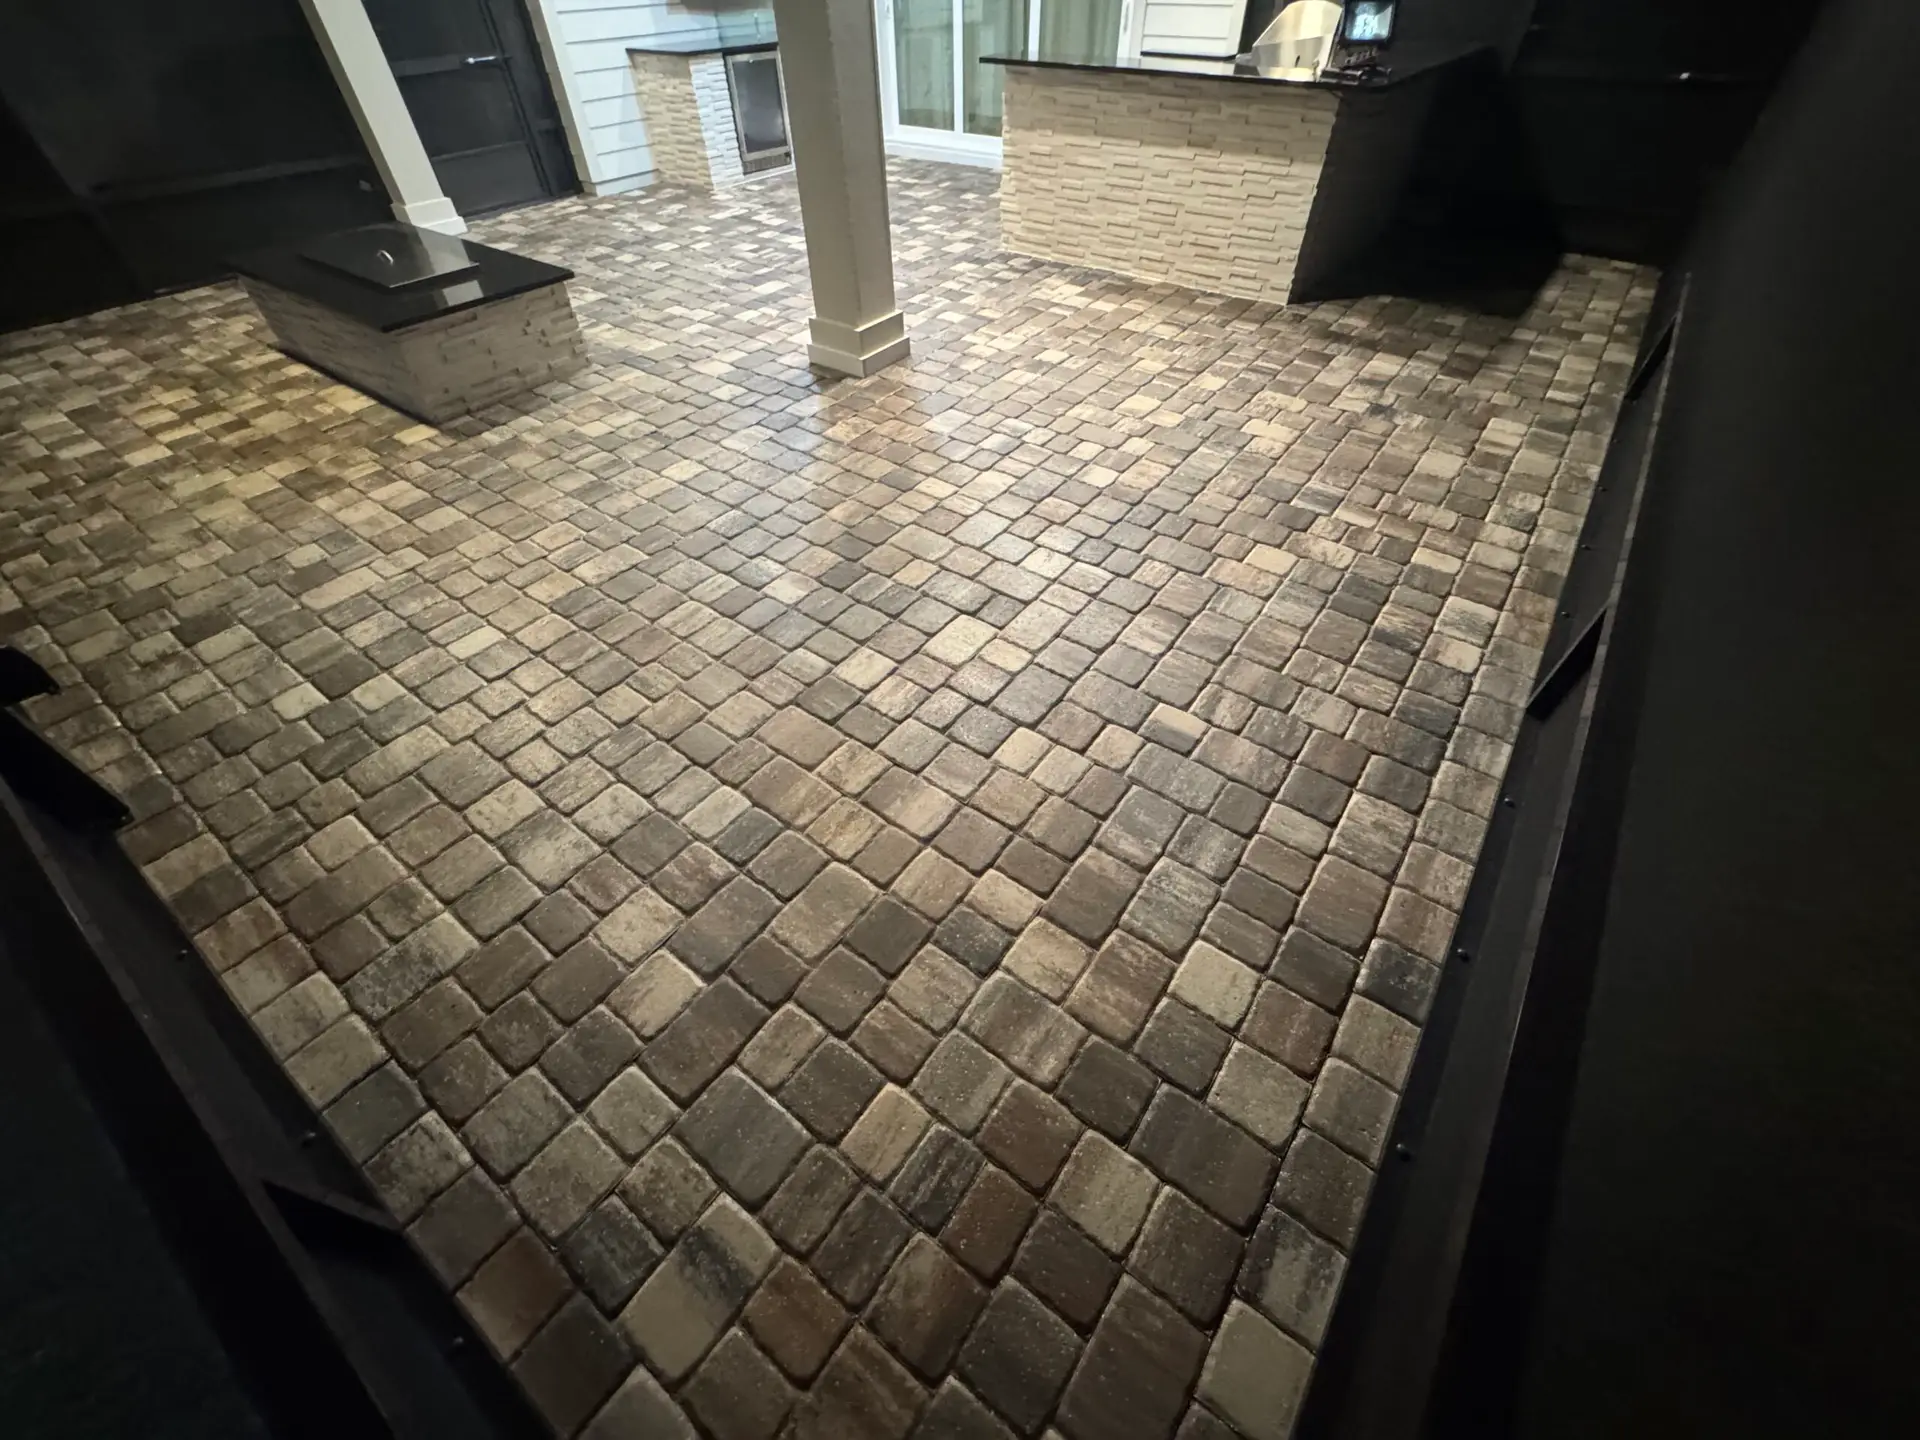
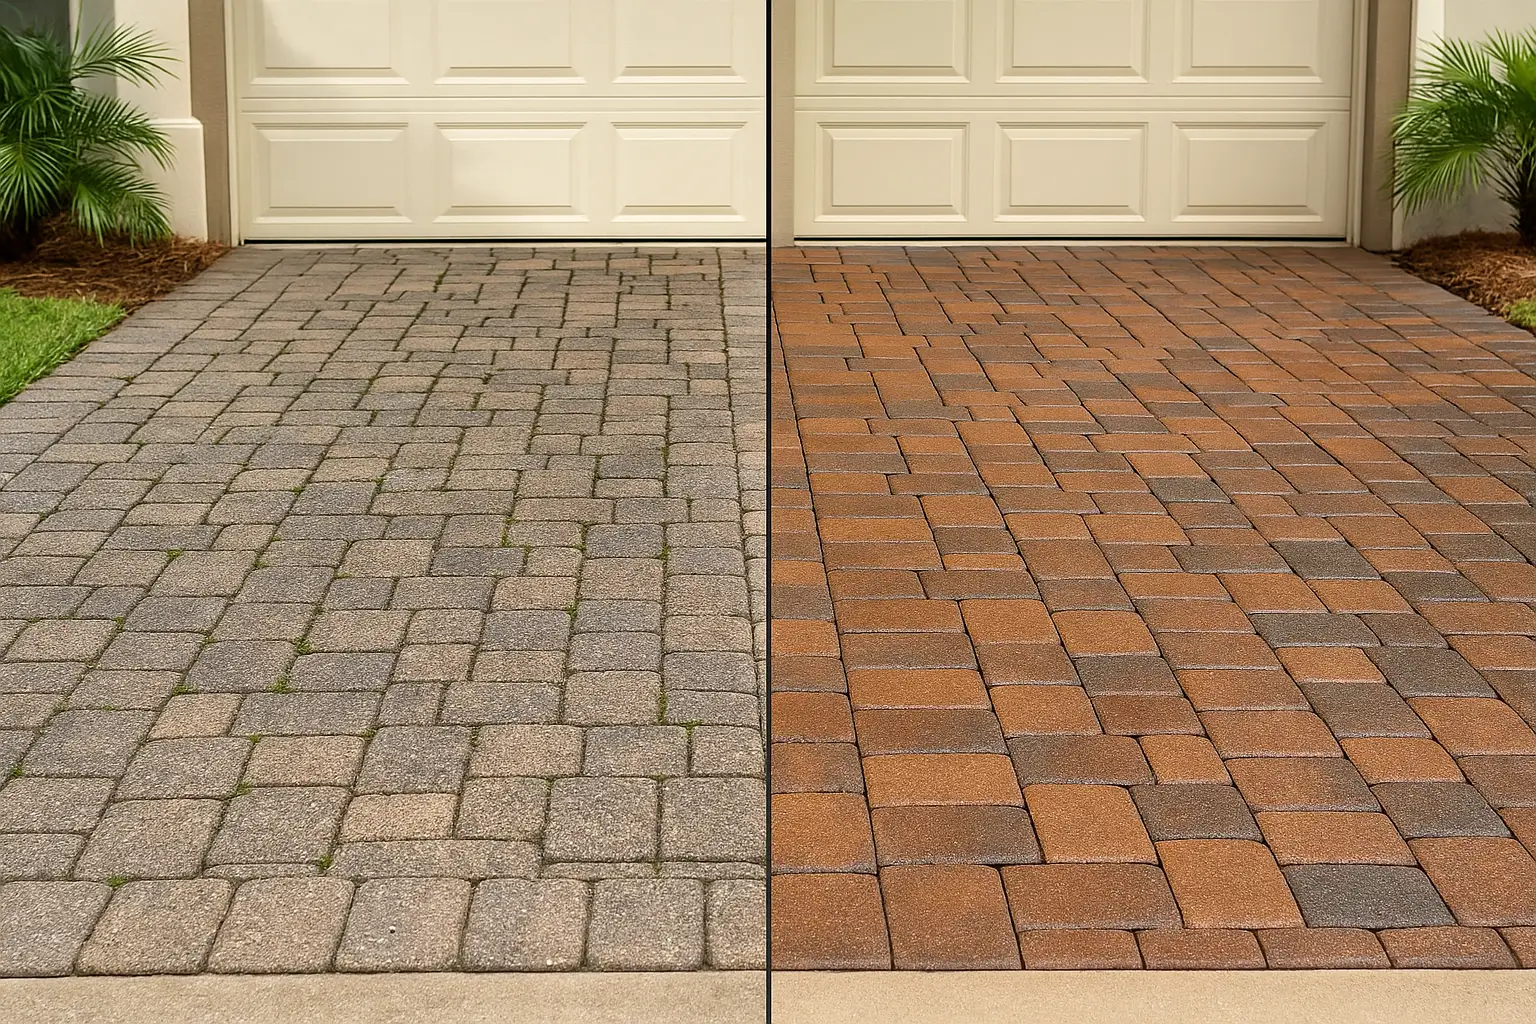
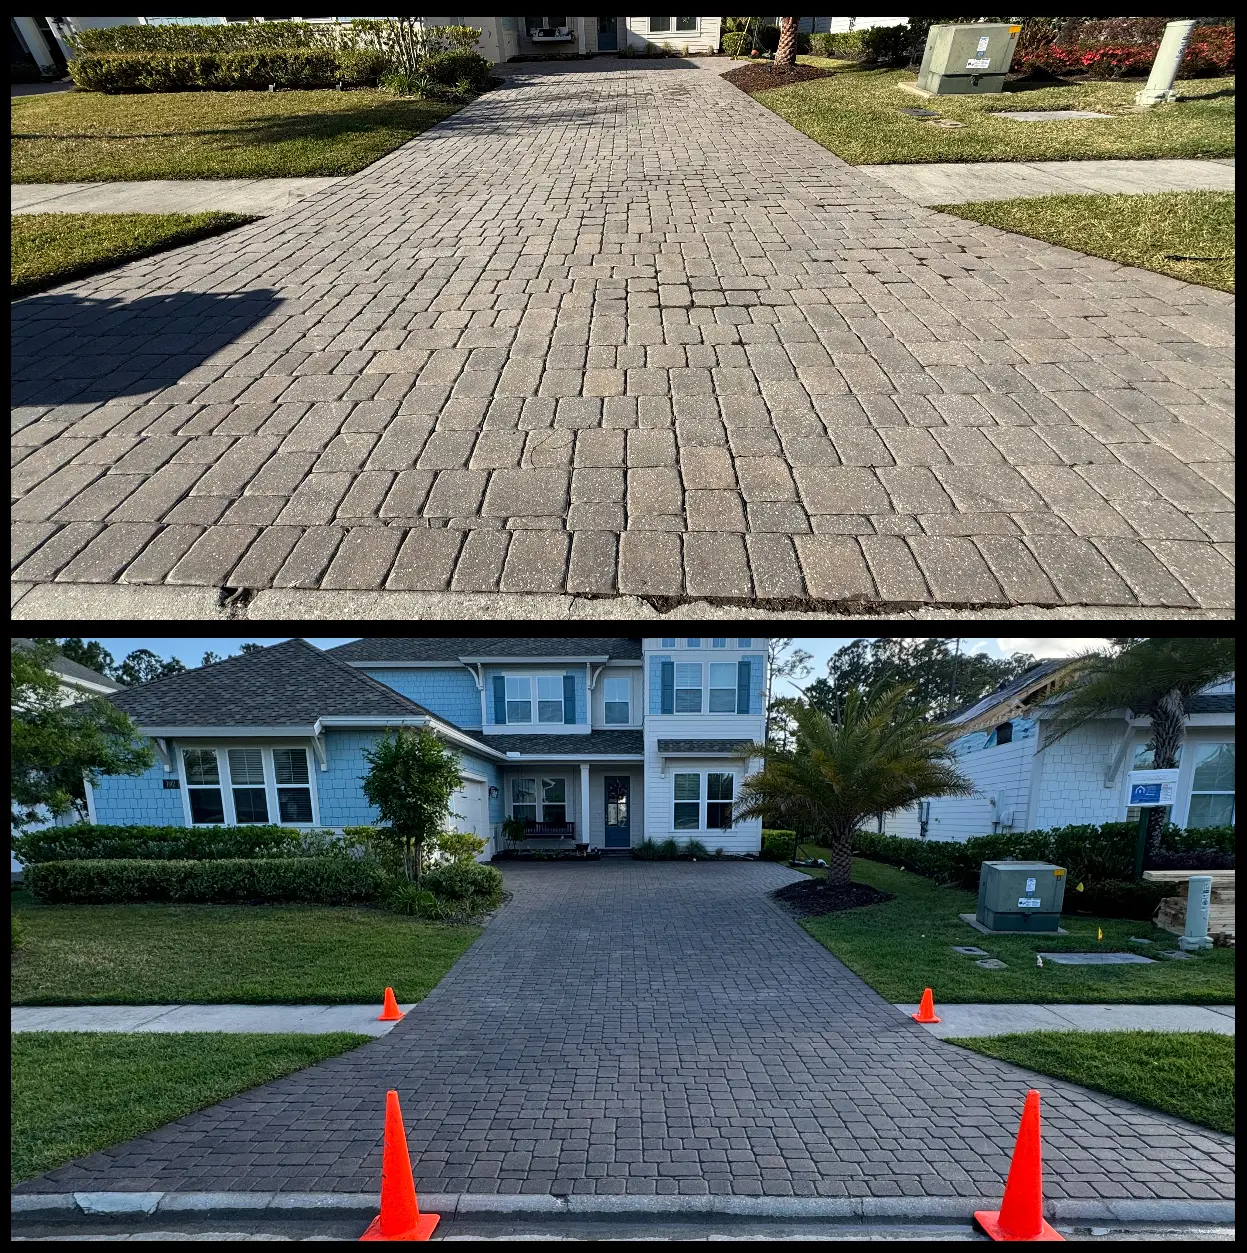
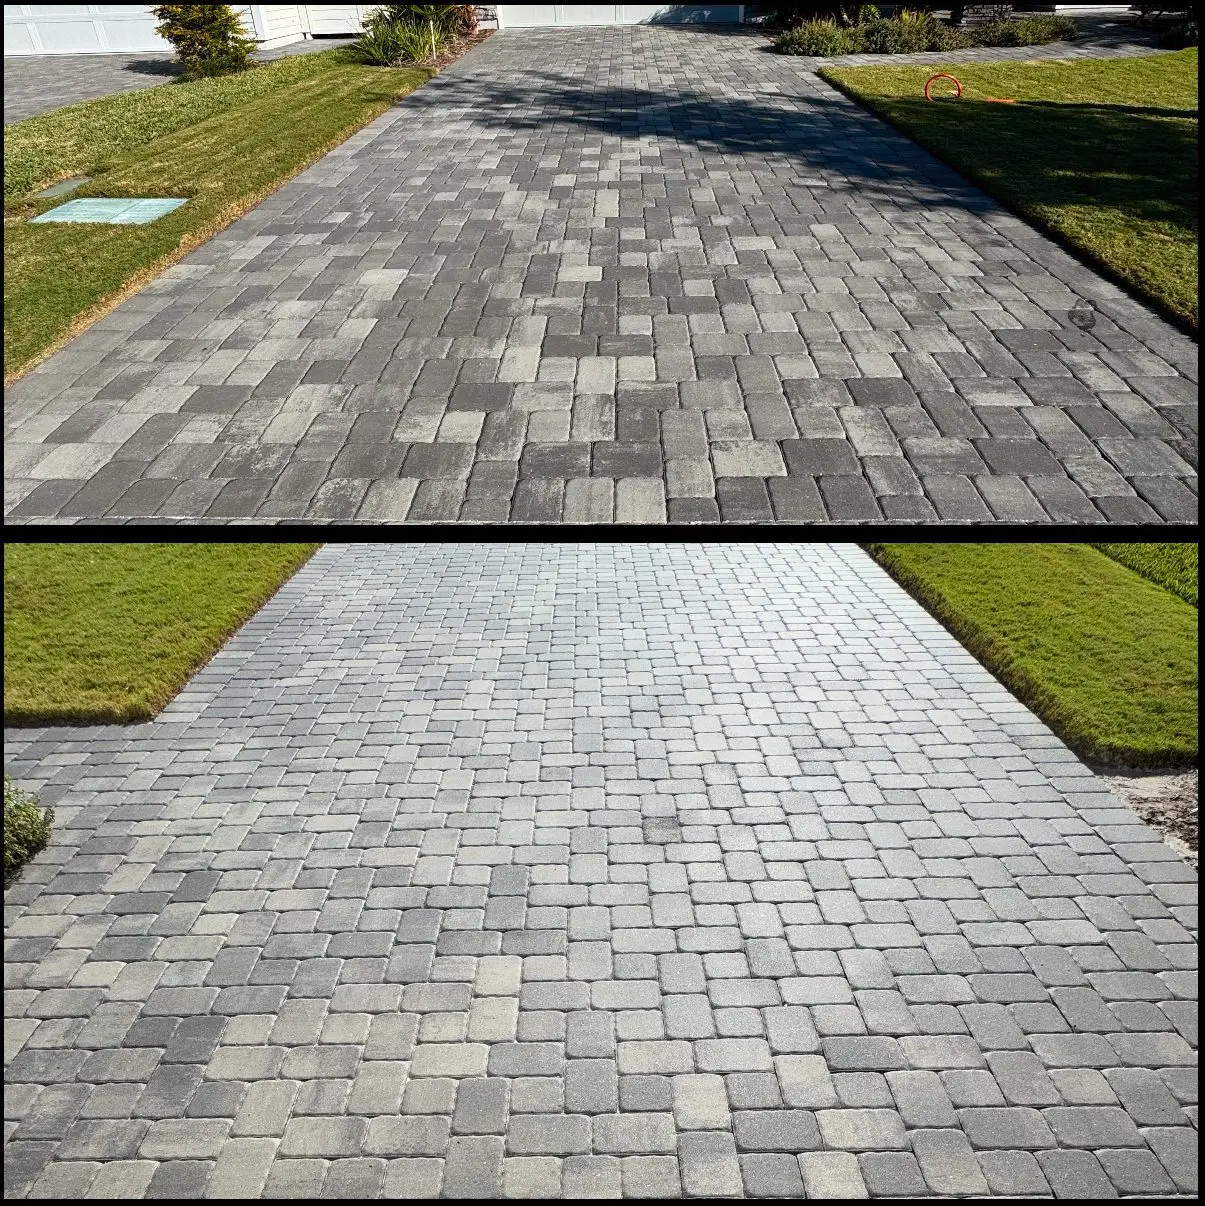
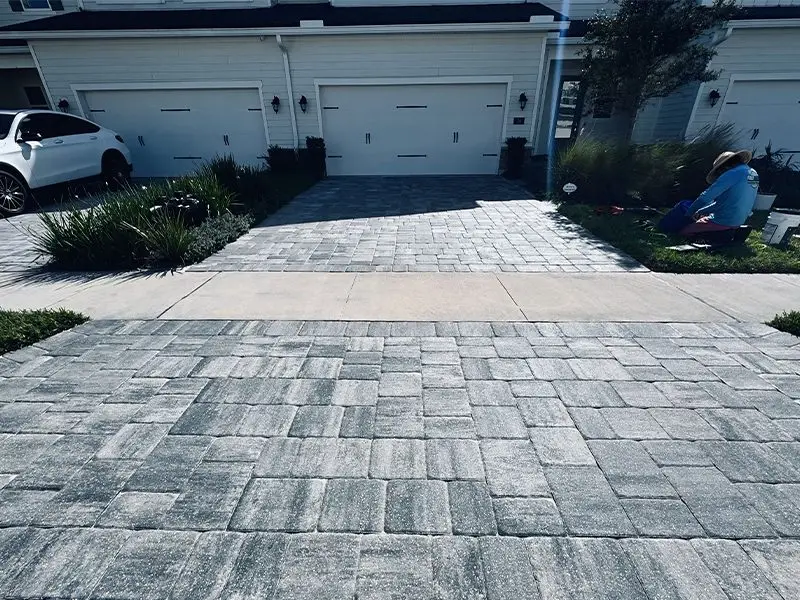
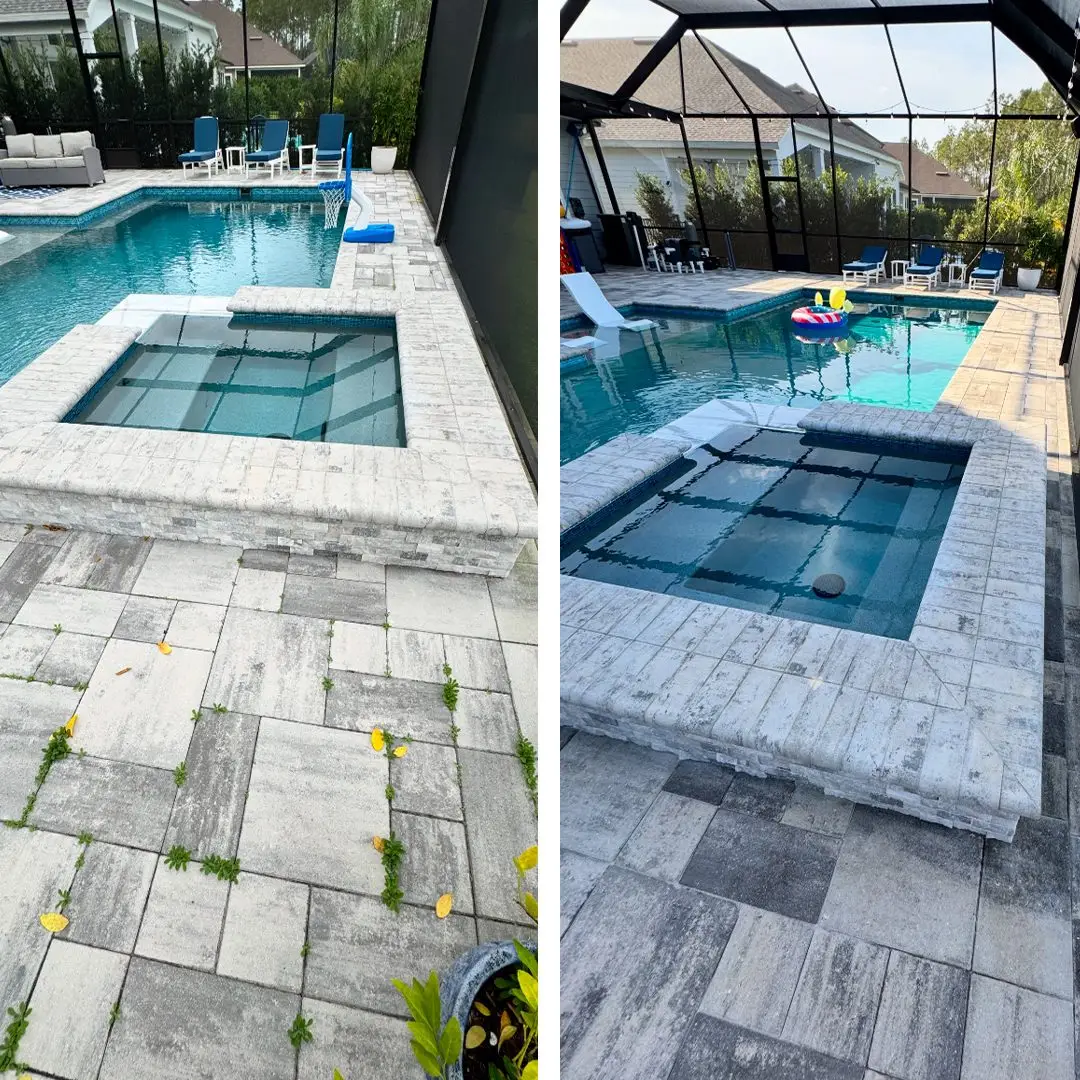
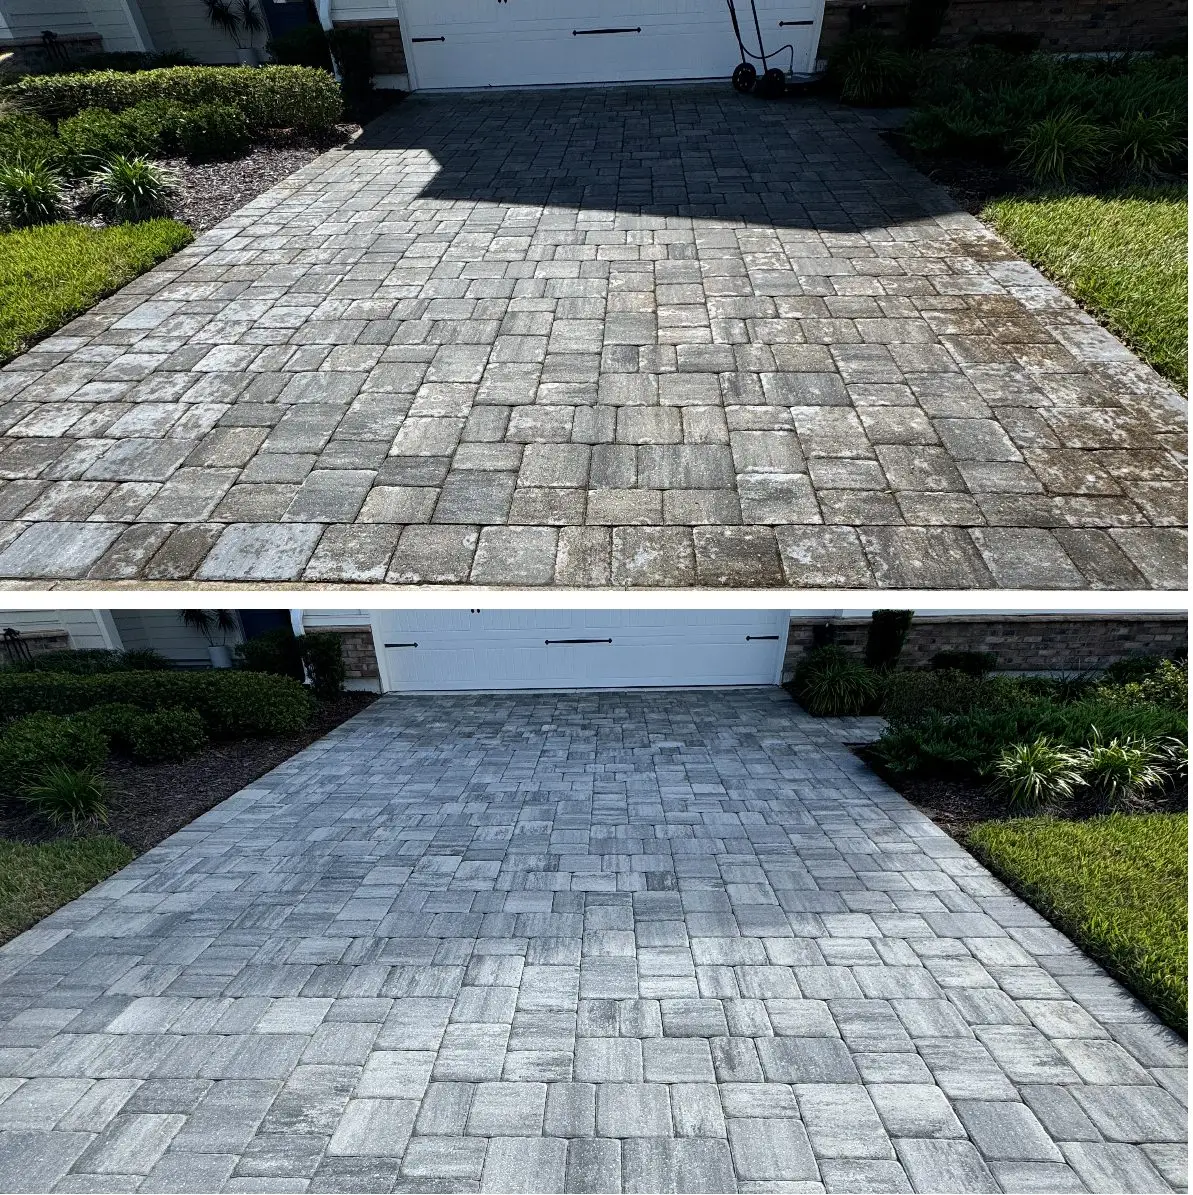
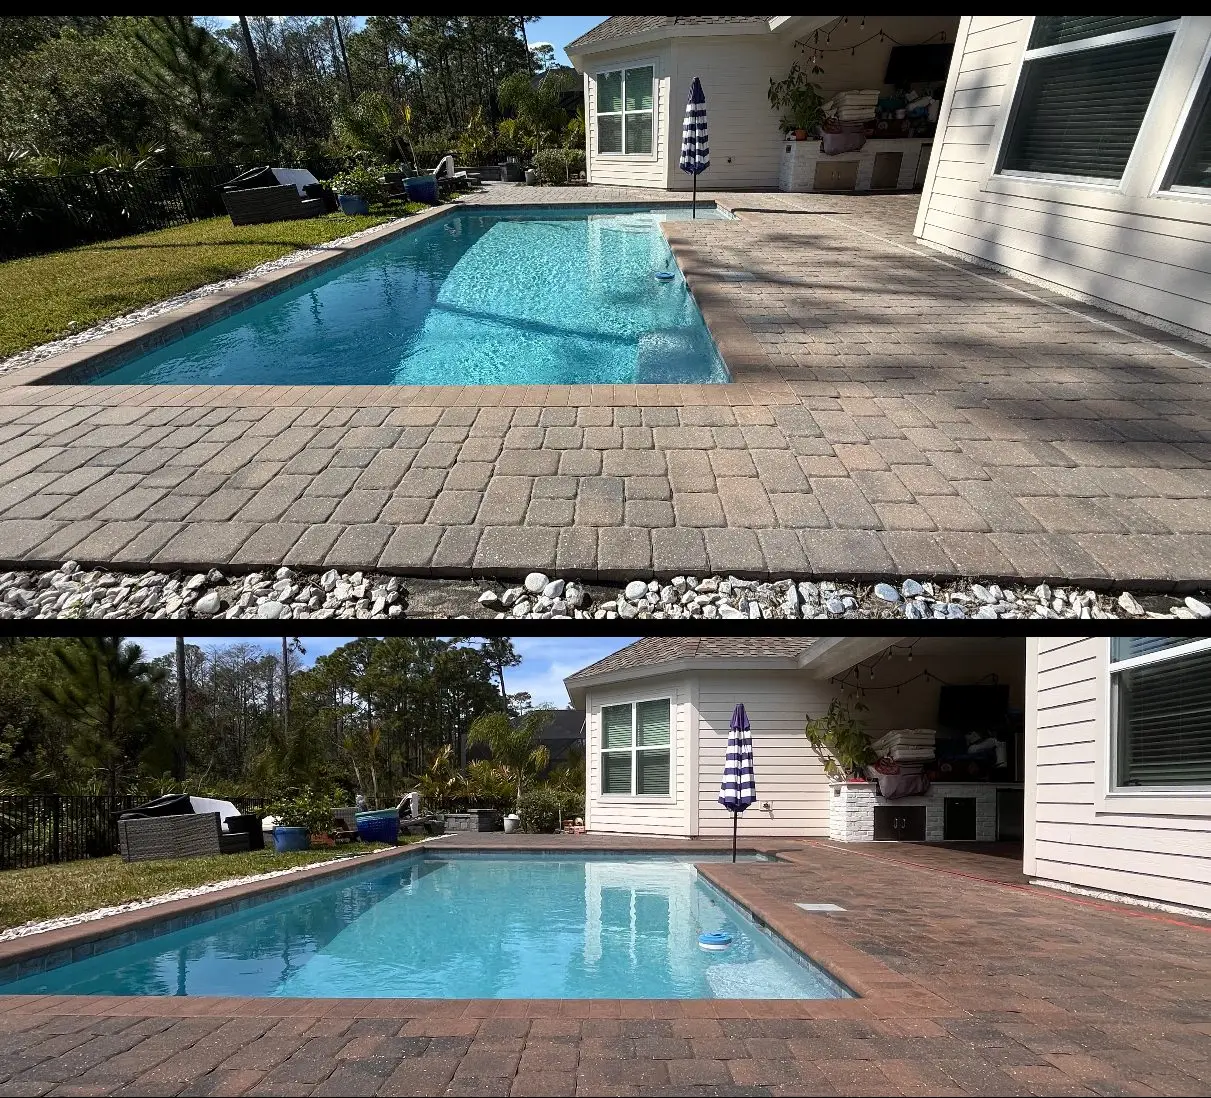
Recent paver sanding & sealing projects across Northeast Florida
Every project shown below followed our complete 5-phase restoration system. No shortcuts. No spray-and-pray. These are real results from real homes in Nocatee, Ponte Vedra, Jacksonville, Amelia Island, and St. Augustine.
Protecting your investment long-term
A properly executed paver sanding and sealing job provides 3–5 years of protection in Northeast Florida's climate. The exact timeline depends on exposure (full sun vs. shaded), traffic level, and surface orientation. Here's what to expect and when:
Year 1
Peak protection and appearance. Color is at maximum depth. Joint sand is fully locked. Stains clean easily. Minimal biological growth.
Years 2–3
Surface sealer gradually wears. Color remains strong. Joint sand stays locked. Annual pressure wash recommended to remove surface buildup and extend sealer life.
Years 3–5
Surface layer is largely worn. Sub-surface protection (D1 coat) still active. Color begins to fade in high-exposure areas. Time to schedule a maintenance re-seal (lighter process than initial service).
Re-Seal
Maintenance re-seals are faster and less expensive than the initial service. Joint sand typically only needs topping off (not full replacement). One new coat of sealer restores full protection.
Use these to separate professionals from spray-and-pray operators
We want you to hire the best company for the job — even if it's not us. These questions will help you evaluate any paver sealing estimate you receive. A professional contractor should be able to answer every one clearly and confidently.
"Do you remove and replace the joint sand, or just seal over what's there?"
If they seal over old sand, walk away. Old sand is contaminated, rounded, and partially missing. Sealing over it is like painting over rotten wood.
"What type of joint sand do you use?"
Look for angular sand meeting ASTM C144 or C33 standards. If they say "polymeric sand," ask about hazing risk and how they'll handle it if it fails. If they say "regular sand" without specifying angular gradation, they may be using rounded sand that won't interlock.
"Is your sealer breathable or film-forming?"
In Florida, breathable (water-based) sealers are the correct choice for exterior pavers. Film-forming acrylics trap moisture and fail within 1–2 years in our humidity. If they can't tell you which type they use, that's a red flag.
"How do you ensure the surface is dry before sealing?"
Professionals use propane torches or forced-air blowers to guarantee moisture removal. "We wait for it to dry" is not a process — Florida's humidity means air-dried pavers still retain subsurface moisture.
"How many coats do you apply, and what's the difference between them?"
A two-coat system (penetrating D1 + surface D2) provides dramatically better and longer-lasting protection than a single coat. If they apply one coat, they're cutting the job in half.
"Can I see completed projects with reviews?"
Legitimate companies have a portfolio and verifiable reviews. Ask for addresses of previous work in your area so you can drive by and see the results after 1–2 years — not just the "day of" photos.
The Gold Standard, Every Time.
We don't top off over old sand. We remove it all, clean the joints, and install fresh ASTM-grade angular sand. Every time.
D1 flood coat for deep penetration. D2 finish coat for surface protection. Two layers of defense — because one isn't enough.
We don't guess on moisture. Propane torch drying ensures 100% dry surfaces, eliminates hazing risk, and sterilizes joints before sealing.
No film-forming acrylics. No moisture-trapping products. Only breathable, water-based sealers engineered for Florida's climate.
Professional surface cleaners — not wand tips. Uniform cleaning without the striping, etching, or uneven results that pressure wand tips create on paver faces.
Full liability coverage. Every team member background-checked. Professional, uniformed crews who respect your property and your time.
Not just pavers — we restore and protect every hardscape material
Each surface has unique chemistry, porosity, and sealer requirements. We've built dedicated pages with surface-specific education, process details, and FAQs. Visit our Sanding & Sealing hub for a complete overview, or explore individual surfaces below:
Serving the premium communities of Northeast Florida
Nocatee · Ponte Vedra Beach · Ponte Vedra · St. Augustine · St. Augustine Beach · Palencia · World Golf Village · Julington Creek · Fruit Cove · CR-210 Corridor · Sawgrass
Jacksonville · Jacksonville Beach · Neptune Beach · Atlantic Beach · San Marco · Riverside · Avondale · Ortega · Mandarin · Southside · Intracoastal West
Amelia Island · Fernandina Beach · Yulee · Amelia National · Nassau Crossing
The most common questions we hear from homeowners
Most residential projects (driveways, pool decks, patios) are completed in one full day. Larger properties or multi-area projects may require two days. The surface needs 24 hours of dry weather after sealing before foot traffic, and 48–72 hours before vehicle traffic on driveways.
With our two-coat breathable sealer system, expect 3–5 years of protection depending on exposure and traffic. South- and west-facing surfaces in full sun may need re-sealing closer to 3 years. Shaded areas and walkways often last 4–5+ years. Maintenance re-seals are quicker and less expensive than the initial service.
Polymeric sand contains binders that harden in the joint, creating a rigid bond in a system designed to be flexible. In Florida's extreme heat cycling, polymeric sand cracks within 1–2 seasons. Once cracked, it must be chiseled out — it can't be blown or pressure-washed like standard sand. Additionally, polymeric sand hazing (a white film from binder residue) is one of the most common complaints in our industry. Angular ASTM sand with breathable sealer outperforms polymeric sand in our climate, lasts longer, and is easier to maintain.
Breathable (water-based) sealers do not create a slippery surface film like film-forming acrylics do. The sealed surface retains the original texture of the paver. For pool decks and spa areas where extra traction is desired, non-slip additives can be incorporated into the D2 finish coat. We evaluate every surface and recommend the appropriate traction level during the estimate.
Yes — but it depends on what was used previously. If a breathable sealer was used, we can clean and re-coat directly. If a film-forming acrylic was used, we may need to chemically strip the old sealer before re-application (acrylic film prevents new sealer from penetrating). We assess the existing sealer type during our on-site estimate and give you an honest recommendation.
Pressure washing removes surface dirt and biological growth — it makes pavers look better temporarily. But it also blasts out joint sand and leaves the surface unprotected. Within weeks, weeds return, ants re-colonize, and stains absorb into the now-exposed paver pores. Sanding and sealing addresses the root cause: it restores structural integrity (sand), prevents biological colonization (sealer), protects color (UV filtering), and resists stains. Pressure washing is step one of our process — not the entire solution.
We seal both concrete pavers and clay brick pavers. The process is the same — the key difference is that clay brick pavers are more porous and may require slightly more sealer per square foot to achieve full saturation. Our on-site assessment accounts for material type when calculating product needs.
We monitor weather forecasts closely and only schedule sealing when there's a clear 24-hour dry window. If rain hits before the sealer has cured (typically 4–6 hours depending on temperature and humidity), it can cause spotting or whitening. In that rare scenario, we return and correct any affected areas at no additional charge. We never seal into a questionable weather window.
The Gold Standard, Every Time.
Request your free on-site estimate below or call us directly at (904) 466-1622. We'll assess your pavers, recommend the right finish, and give you a transparent, no-pressure quote.
Most estimates are completed within 24 hours.
Licensed · Insured · Background-Checked · Serving St. Johns, Duval & Nassau Counties · (904) 466-1622